

How To Print Procreate Art On Canvas
How to Impress from the Procreate App
Procreate allows you to create digital calligraphy, merely sometimes you desire a printed copy of your piece. Whether it's for your portfolio or to requite as a gift, it is possible to transfer your on-screen artwork into a physical piece. Instead of starting with how to export your work to a printer, let's commencement from the very beginning of creating your sheet.
Step 1: Set Up Your Procreate Canvass
Preparing your canvass before you brainstorm your projection is important. (Already created your project? That'south fine, just skip to Step 3.) Setting your sail dimensions at the start will assist yous avoid any issues such as creating a file that's too small that would be blurry when printed, or using the wrong proportions.
Canvas Dimensions
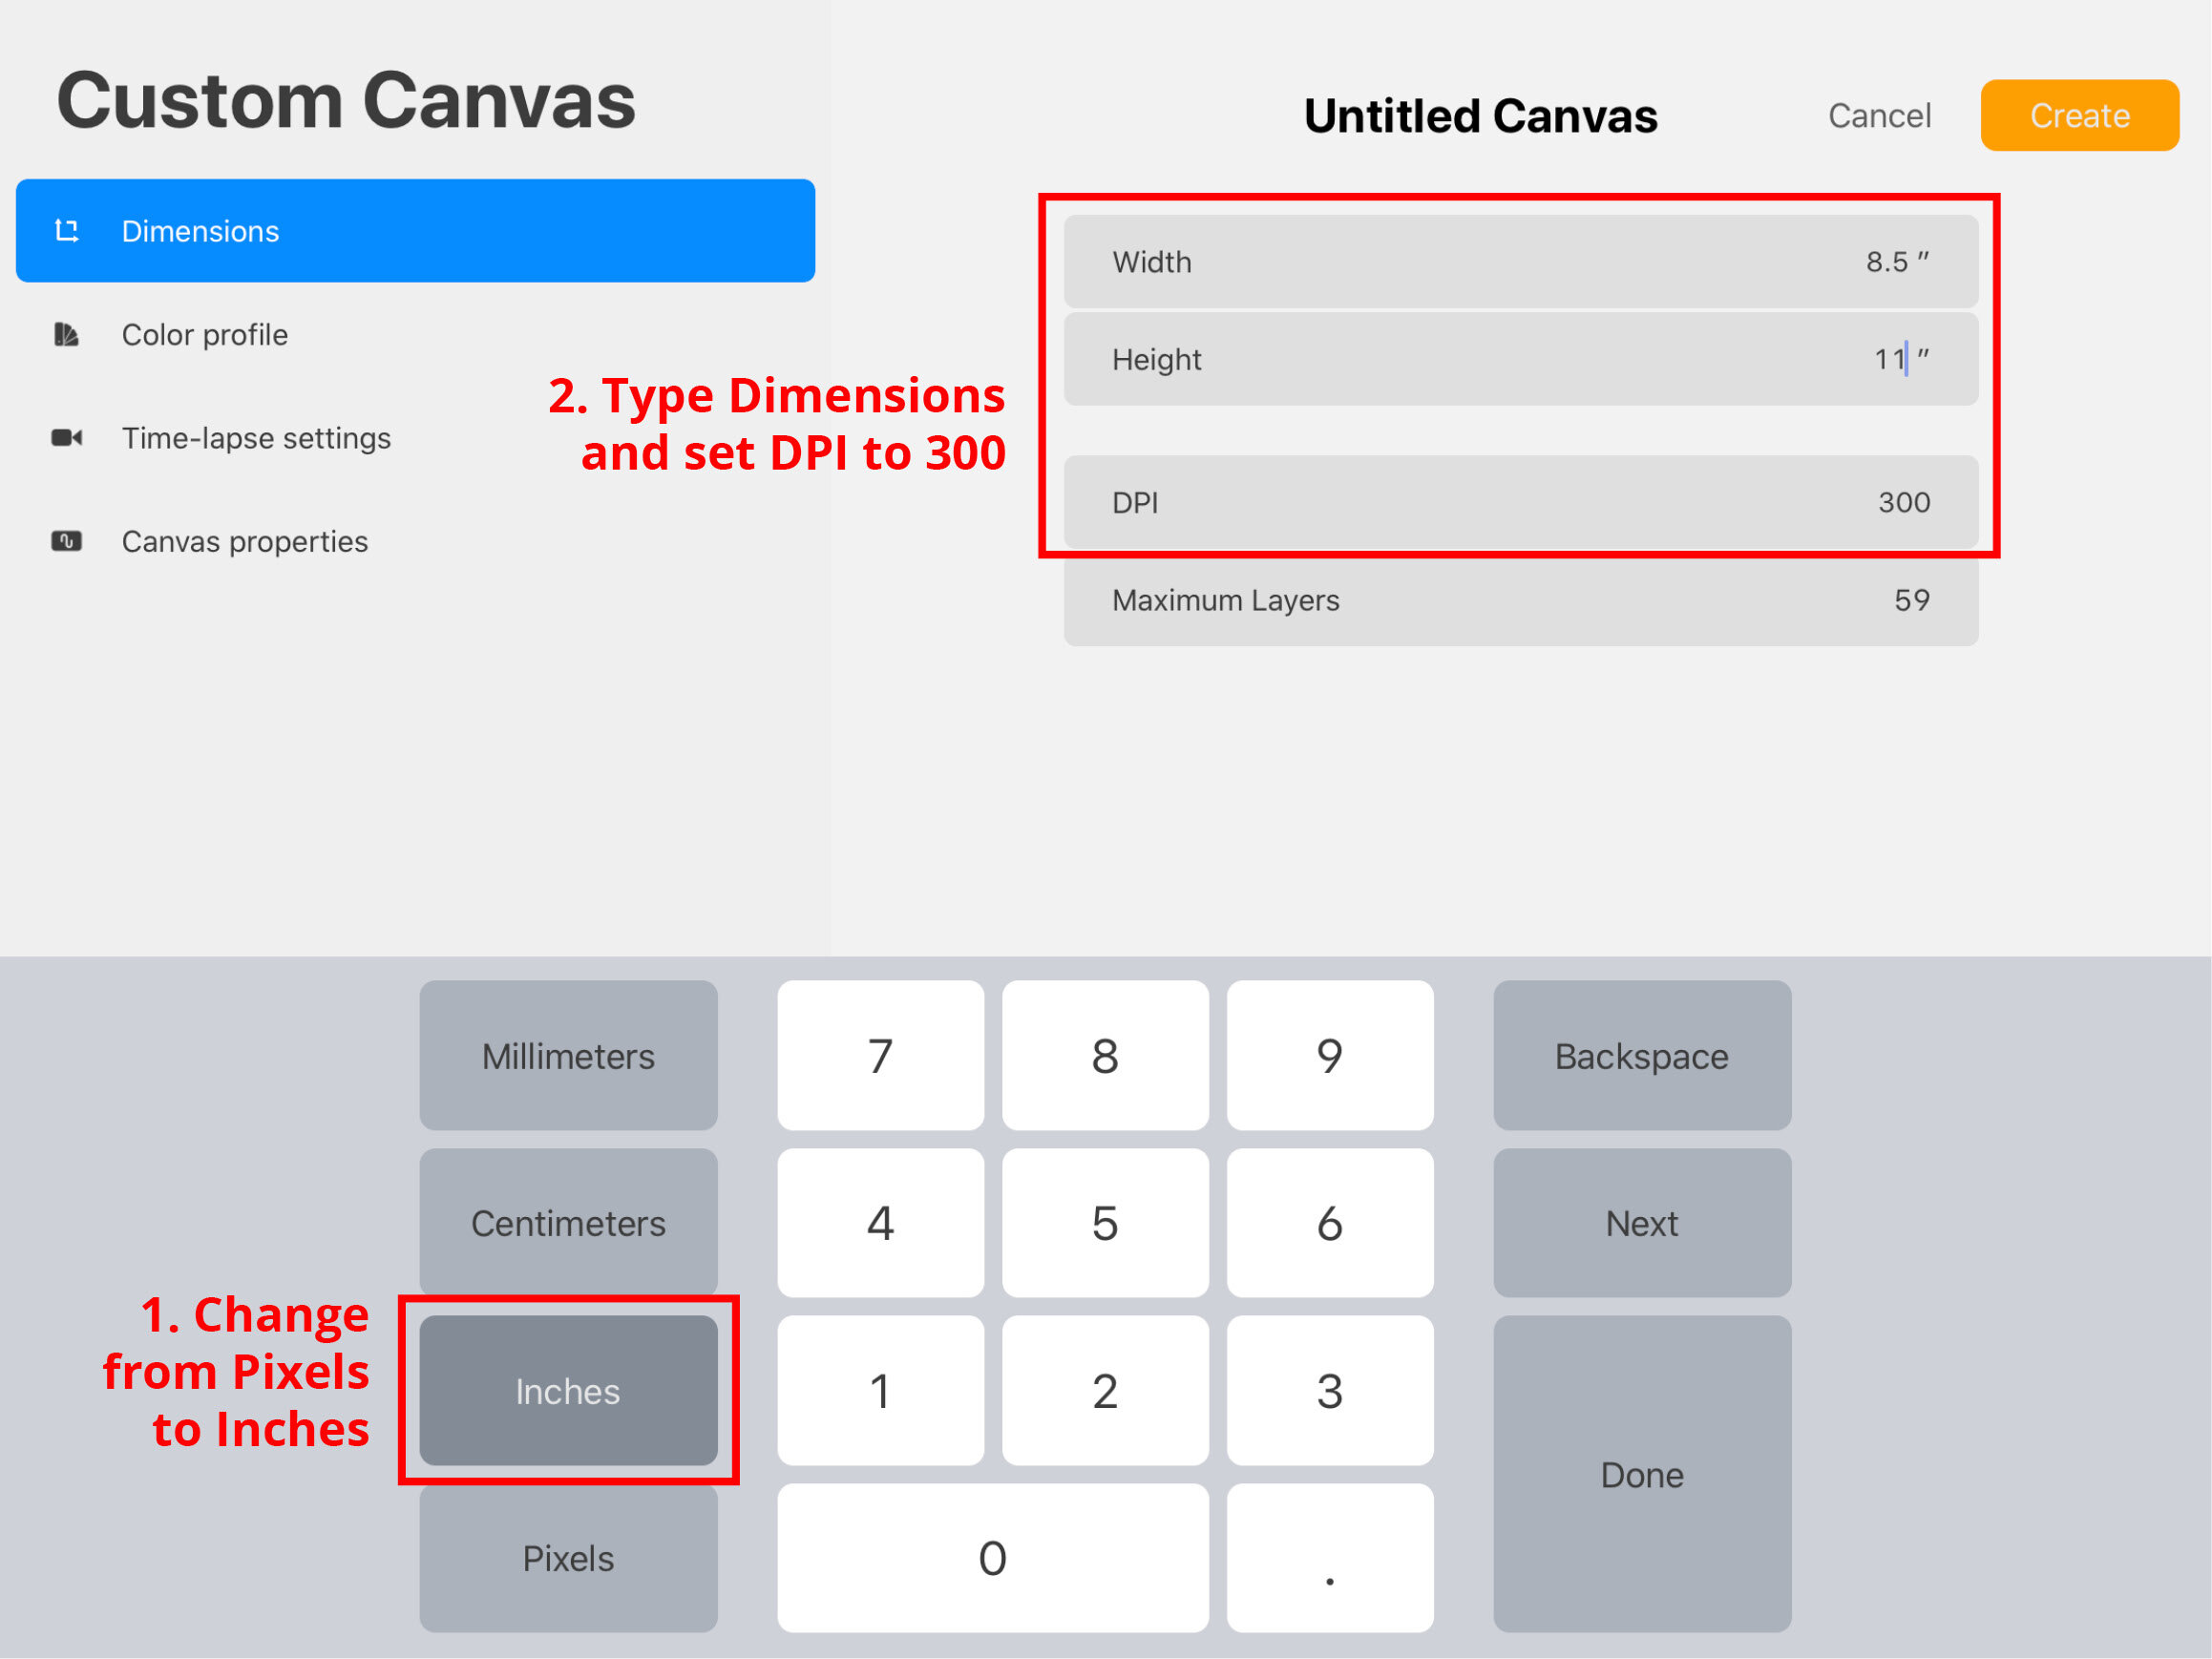
Create a new canvas and set it to the physical dimensions of what you want to print. For example, if you'd similar to print a Letter-sized design, set the dimensions to eight.5x11 inches.
Set up DPI to 300. DPI stands for "dots per inch" and is the number of ink dots the printer can squeeze into an inch of the paper. A college DPI gives y'all a meliorate quality image. Here's how:
In the Gallery view, create a new canvas (superlative correct corner) and choose Custom Dimensions (peak right icon).
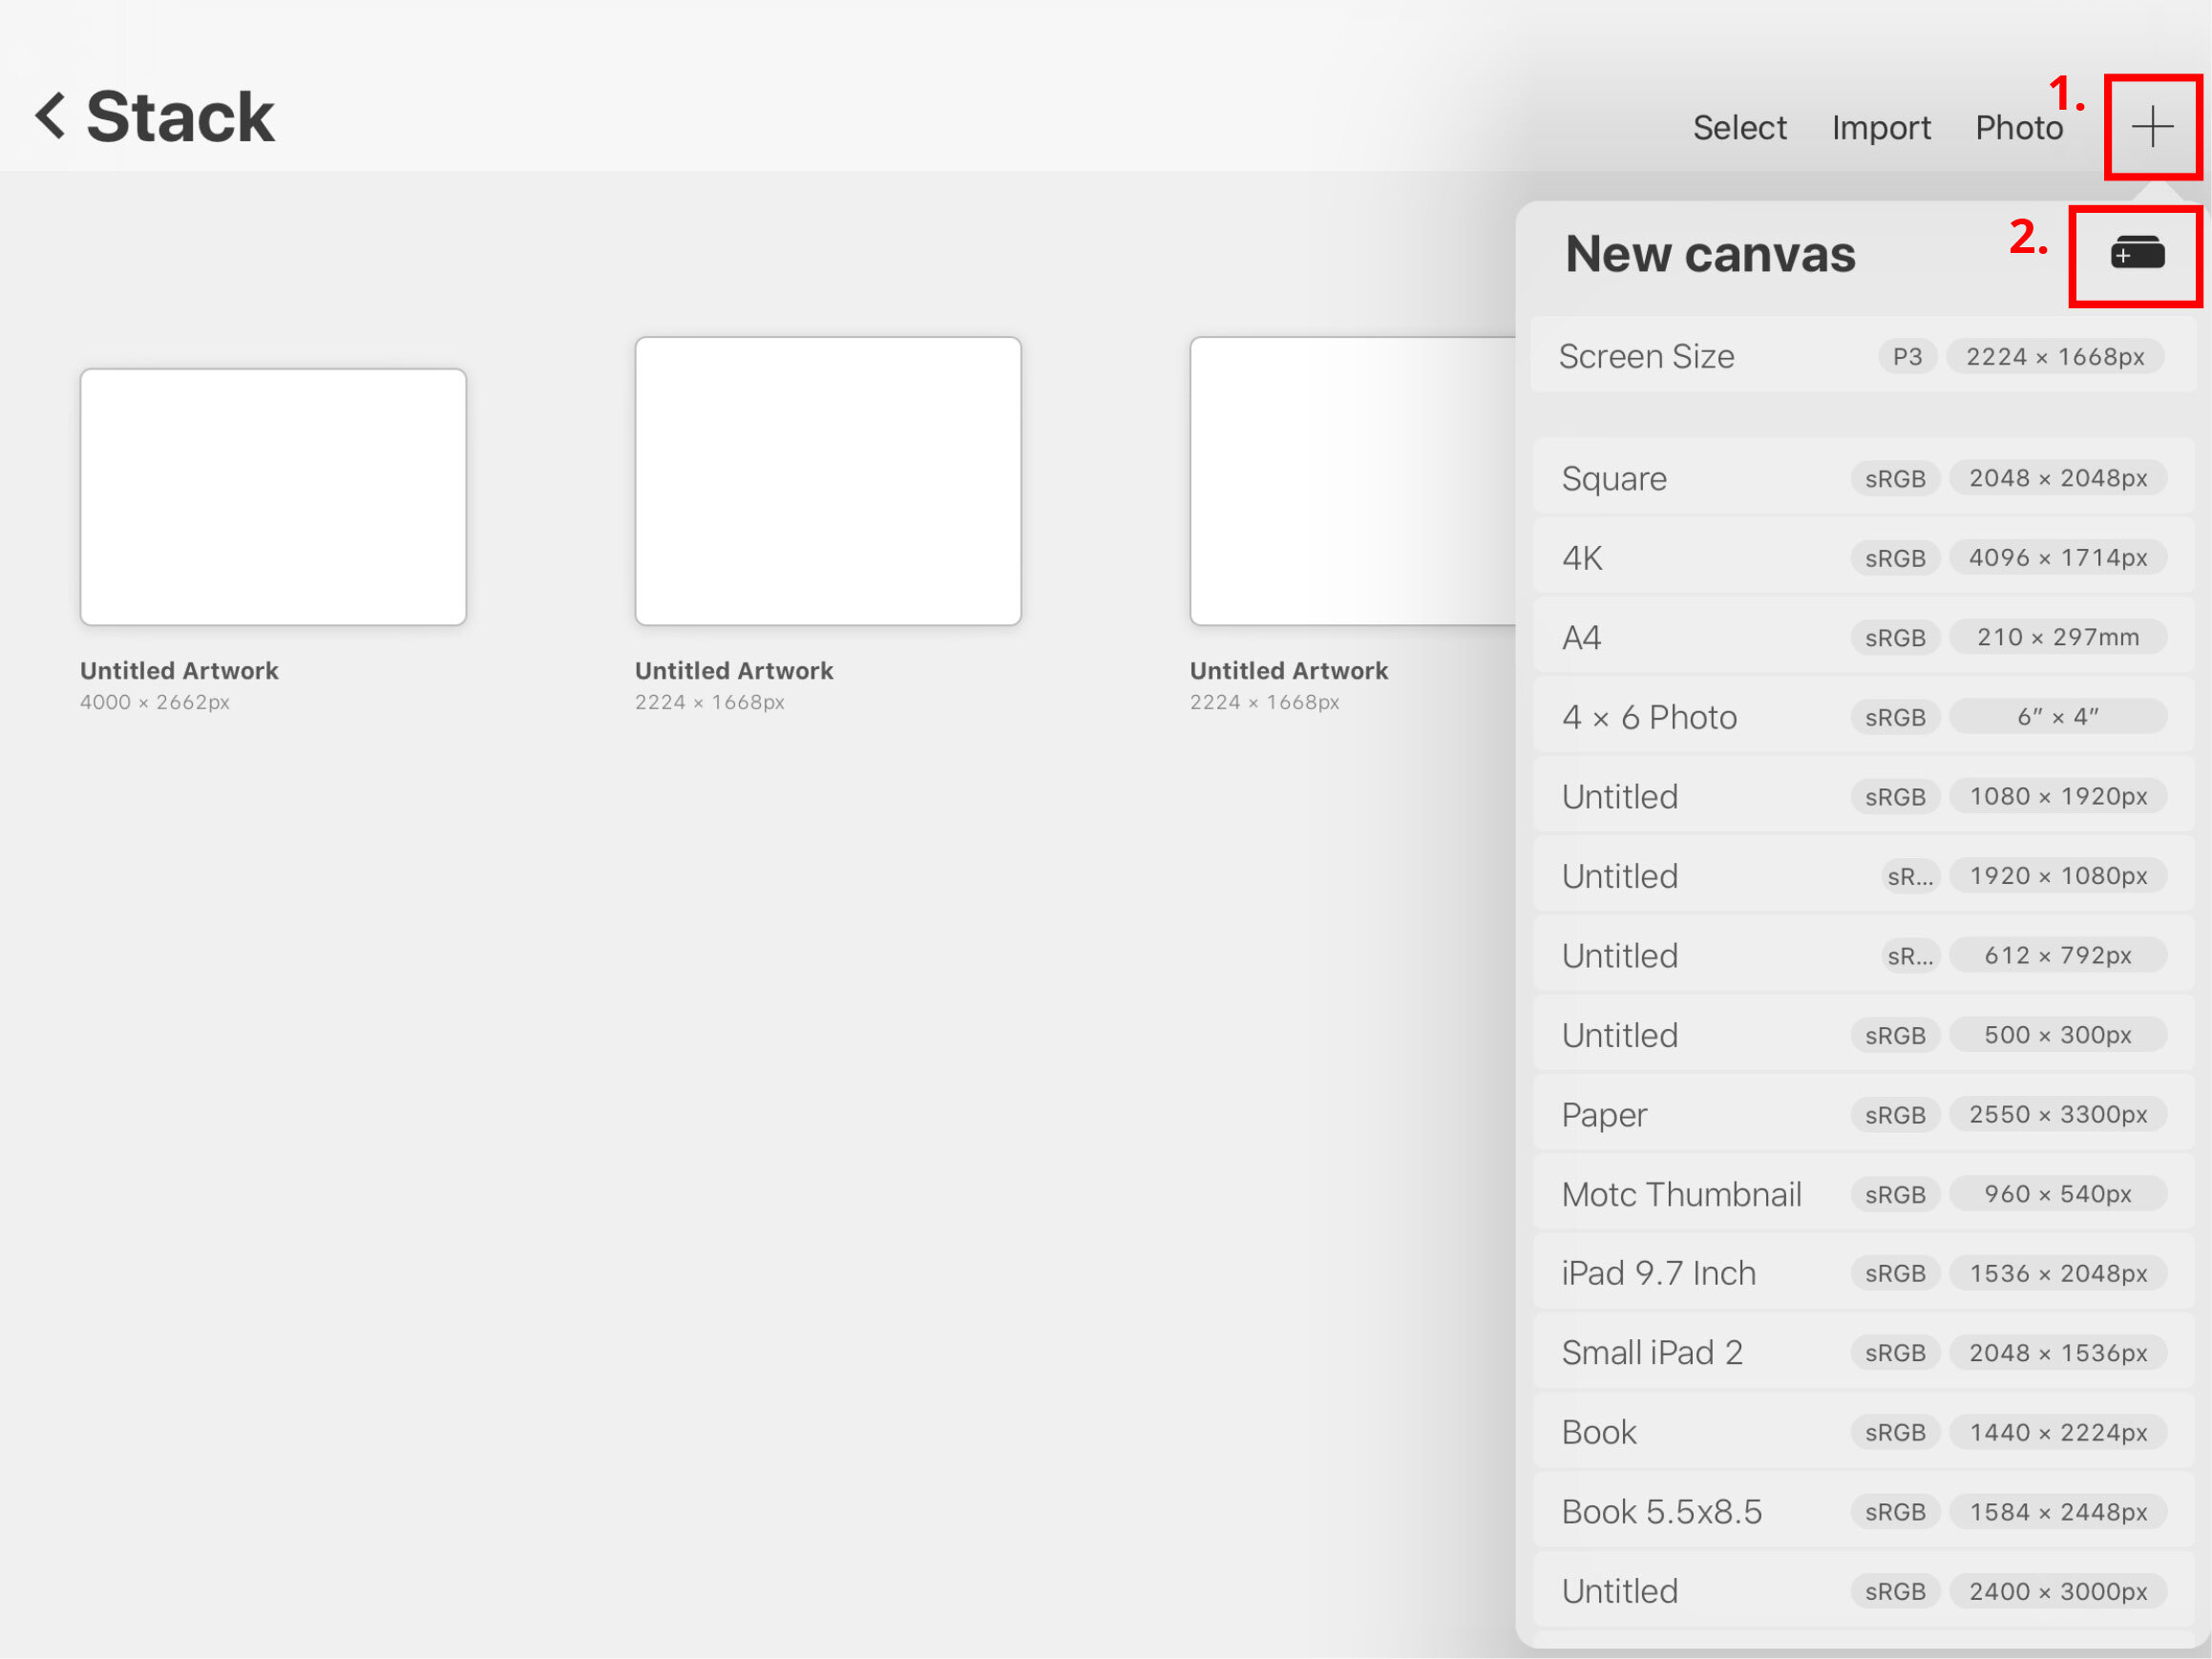
Arrange the dimensions and DPI settings. Note: You can set your dimensions to inches instead of pixels at the bottom next to the number keypad.
If your design isn't the same proportions as your paper (for example, if you want to print a square image on letter of the alphabet-sized newspaper), simply prepare the dimensions to your square size.
Recollect that it's ever better to make your canvas also big than too small. If you start with a pocket-size canvass, printing it at a larger size will issue in a blurry epitome. Starting too large and scaling down will nevertheless give yous a clear consequence.
Colour Profile
There'southward lots of defoliation effectually Colour Profile with some people proverb that you HAVE TO Apply CMYK in order to print. That'due south not *exactly* right… in that location's zilch stopping you lot from press an RGB image. You don't take to catechumen it to CMYK in order to print.
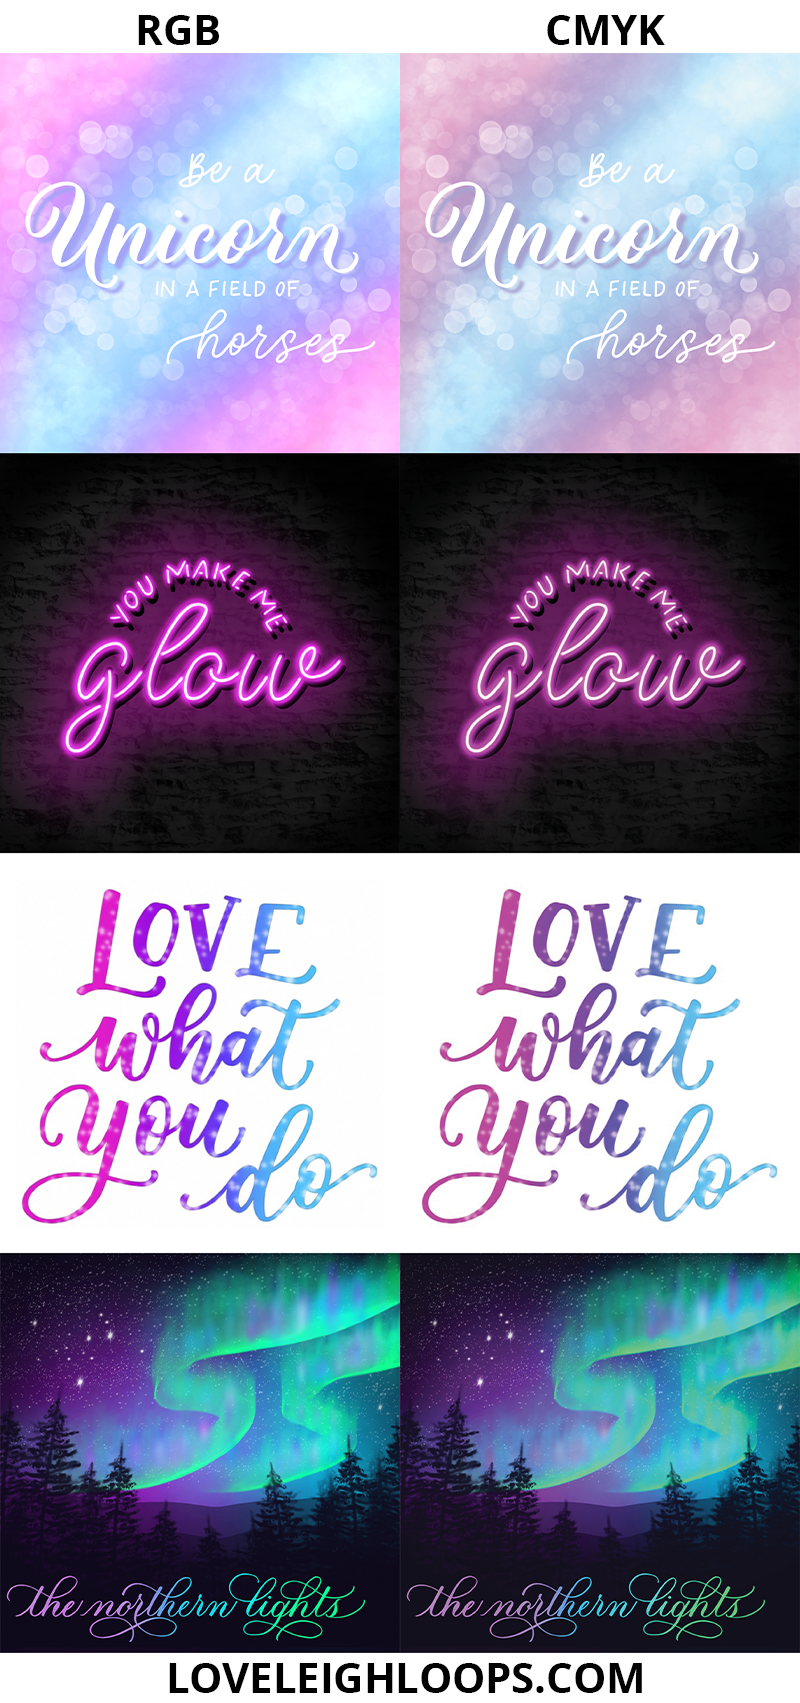
However, the colors may show up differently when the pattern is on paper because the color is created with dots of ink instead of pixels of light. Here's an example of the difference:
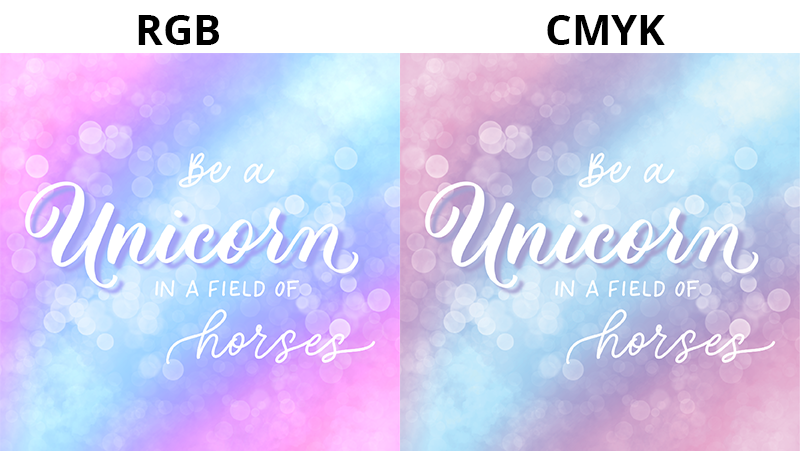
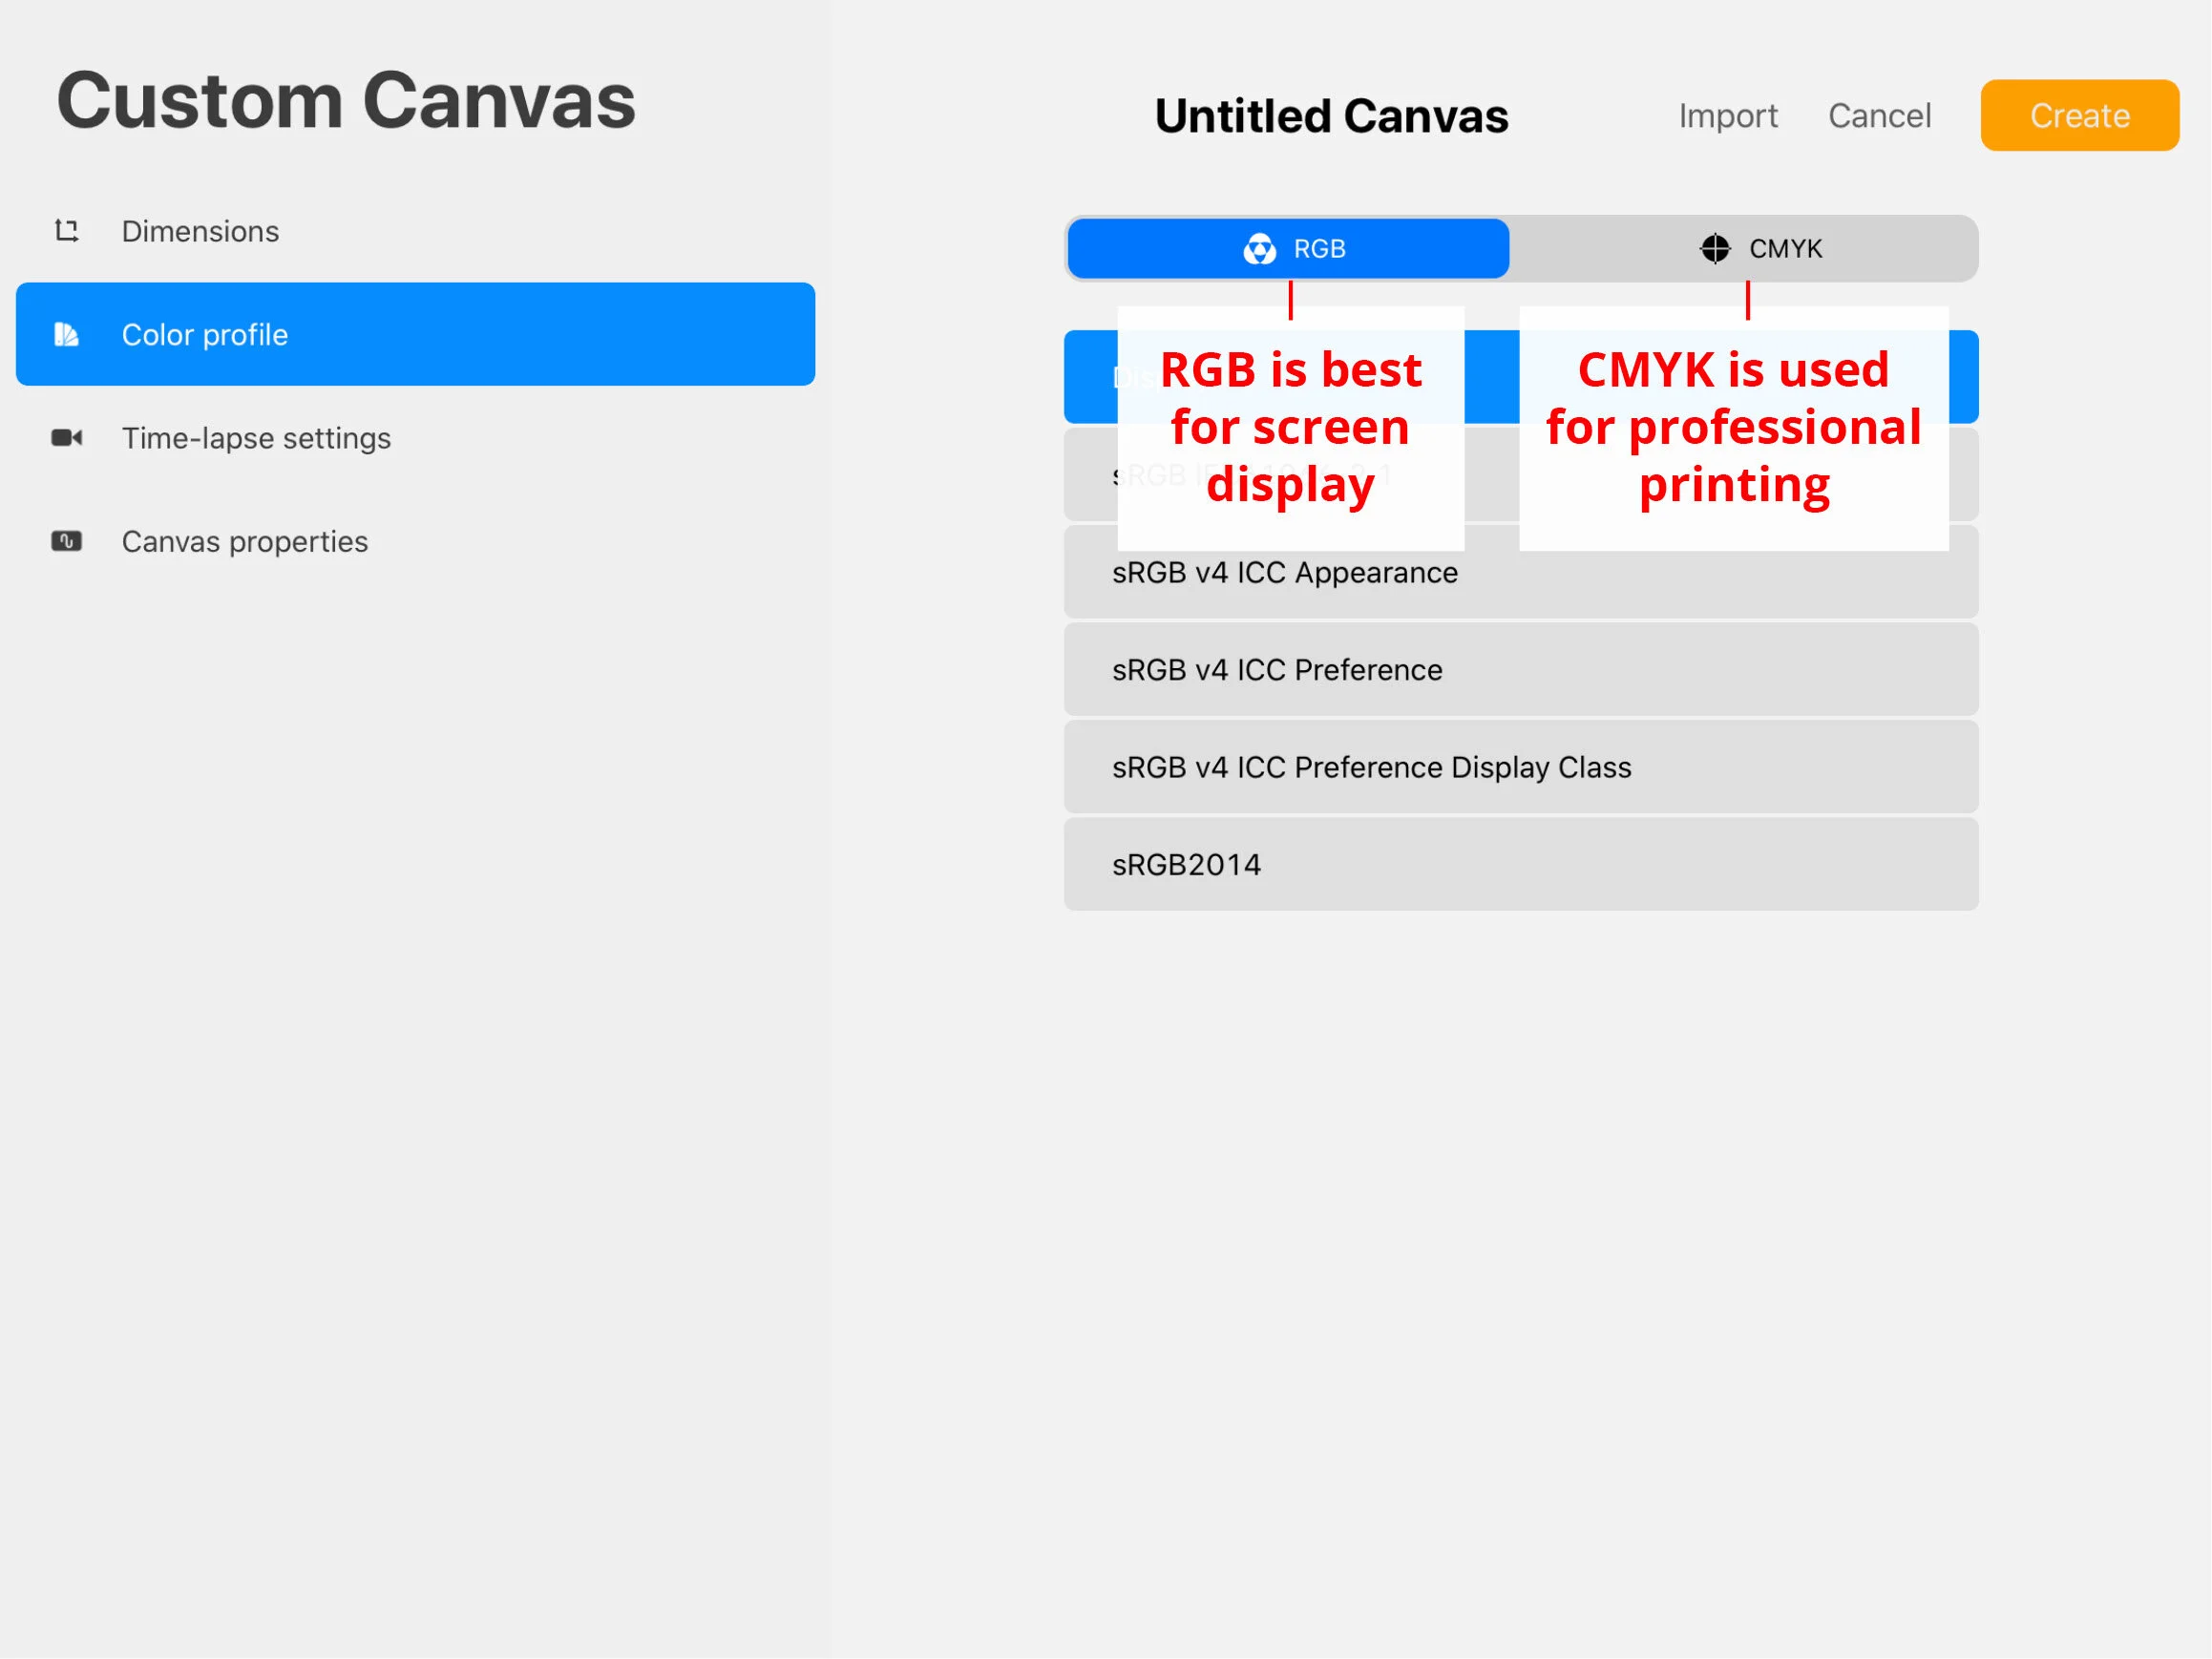
If your main goal is to impress your piece of work, and you desire your artwork to look like the finish issue while y'all're working on screen, set your Colour Profile to CMYK. This will dull your color palette but it volition make the colors match better with your final physical piece.
But if you intend to display your work on a screen and print a copy of your work equally a fill-in, use the default RGB Colour Profile. We've even read that some at-home printers tin can closely match the look of RGB, so unless you're using a print store or other service, yous can probably go abroad with using RGB. (Also, if you're using black and white or a very muted colour palette, then in that location won't be much difference anyhow.)
Acquire more than about RGB vs CMYK at the bottom of this web log post.
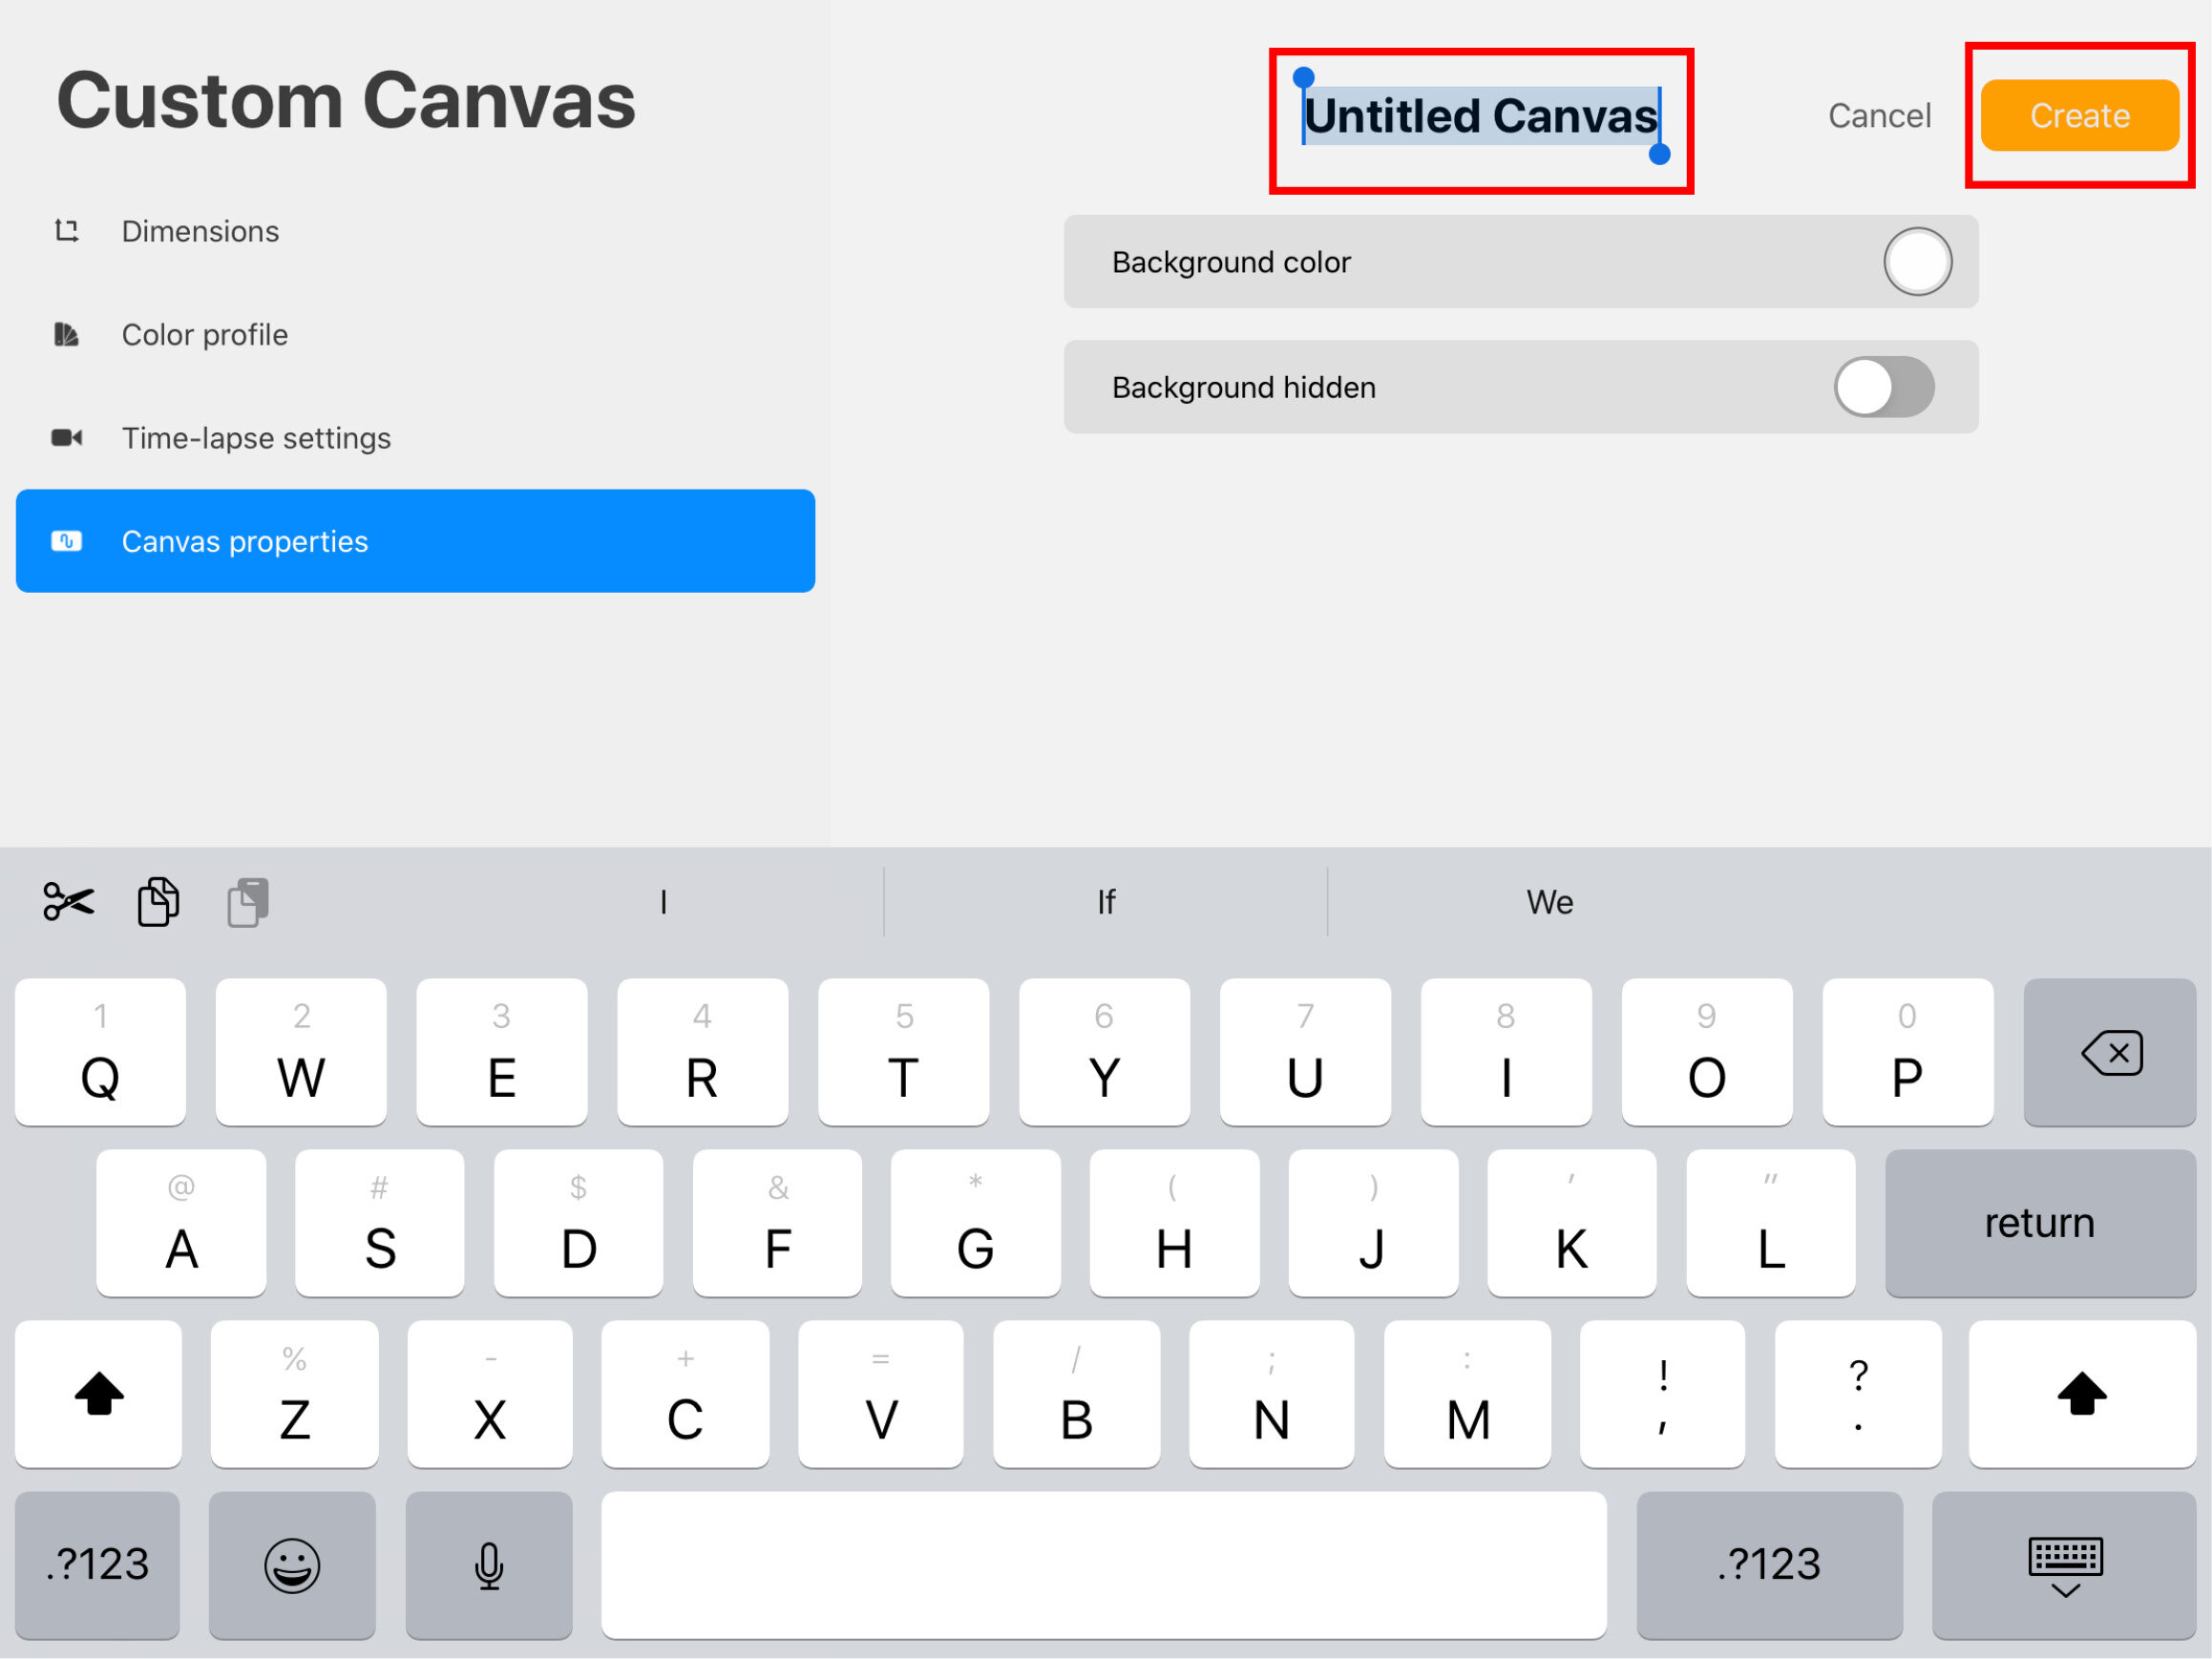
Save Custom Sheet Size
If you'd like to re-use the canvas dimensions you lot've just fix up for futurity projects, you can proper noun this template. In "Canvass Properties", tap the words "Untitled Canvas" and type in a descriptive name that includes the dimensions and DPI. So choose Create. Next time you create a projection, y'all'll be able to select this template from your list of canvas sizes.
Set-Up Note: If yous're using a print store, ask what their specifications are first. They may accept specific dimensions, DPI, or Color Profile they want you to use.
Footstep 2: Create Project
Your turn! Create your piece in Procreate. Remember, if you set your canvass size to the size of a piece of newspaper, filling your entire sail will fill the whole page once you lot print it.
Step 3: Export Your Project
When you're gear up to print, you'll demand to get your blueprint from Procreate onto your calculator in social club to print it. (Note: Some printers accept the option to connect via bluetooth to your iPad so you lot tin try that out if y'all have one, merely we always use the estimator method.)
How to export a Procreate project as a PNG file:
-
Open the Actions Carte (wrench icon).
-
Select Share.
-
Select PNG.
-
Send the PNG to your computer via e-mail, AirDrop, DropBox, or your preferred transfer method.

Or, if you have a printer that can connect to your iPad wirelessly, you tin can print directly from this screen.

Once the paradigm file is on your figurer, open up the PNG file and cull File > Impress. View the Impress Preview and brand sure it looks correct; you may need to choose "Impress Unabridged Image". If you don't want to print a total-folio version, y'all can scale it down in the Printer settings.
If you want to re-size your image or impress multiple images on the aforementioned folio, you lot can insert the images into a programme such as Microsoft Word or InDesign, make your changes, and and so press print.
File Type
Nosotros typically use the PNG file type for images, but you lot can also export your project every bit a PDF and it will retain the quality and dimensions. Just open the PDF on your computer and cull File > Print. You won't be able to insert the PDF into a programme similar Discussion to create a collage or resize/crop the image, so a PDF is all-time for printing every bit-is.
If you're using a print store instead of printing at dwelling house, check with them on what file blazon they require.
You may also like: Procreate Calligraphy Ultimate Beginner Guide
Farther Reading
To acquire more nearly setting upward your canvas size, cheque out this calculator from Bardot Brush.
If you're interested in getting your designs printed on products, this web log post from Liz Kohler Brown is a great source of information
If your printed projects look very different in colour compared to your screen, you may need to calibrate your screen. Teela shares her printing and color calibrating process hither.
What'due south the difference between RGB and CMYK?
RGB is the color way that combines Crimson, Green and Blue lite to create the colors you come across on screen. It's the default for Procreate and is great for sharing artwork online. Have y'all e'er noticed that when you print something, information technology doesn't look equally bright as it does on a well-lit screen? Part of that is because of the absence of lite shining from backside the image, merely as well because printers print in a dissimilar color mode: CMYK. This stands for cyan, magenta, yellow, central (black) and corresponds to the ink cartridges within the printer.
Based on our research, modernistic dwelling computers are able to take an RGB image and print it with like results. Nonetheless, some print shops simply print with CMYK and may require that type of image file. They may be able to convert the image for yous. So, unless you really want to make sure that your on-screen artwork looks exactly like it will await when printed on a CMYK printer, you lot can stick with the default of RGB. If your master intent is to share your piece of work online, definitely use RGB and simply be enlightened that printers can't always replicate an on-screen effect perfectly.
How to Design and Print a Greeting Menu in Procreate
Check out our blog post to watch equally nosotros create a greeting card and print it using just the Procreate App! Read more here.
Source: https://www.loveleighloops.com/blog/how-to-print-from-procreate
0 Response to "How To Print Procreate Art On Canvas"
Post a Comment